Modern Wooden Shelf Plans for Minimalist Decor
Modern Wooden Shelf Plans for Minimalist Decor
Craving a clean, uncluttered space that reflects your minimalist aesthetic? Look no further! Building your own modern wooden shelves is a rewarding project that allows you to perfectly tailor both the functionality and the aesthetic to your home. Forget mass-produced furniture; this guide empowers you to create stunning, minimalist shelves that add both style and practicality to any room.
Choosing Your Wood and Design
The foundation of your minimalist shelf lies in the selection of wood. Opt for clean lines and a natural finish. Light-colored woods like pine, birch, or maple provide a bright, airy feel, perfectly complementing minimalist décor. Consider the grain of the wood; a subtle, consistent pattern adds visual interest without overwhelming the space. For a truly minimalist look, avoid overly ornate or busy grains. Before you even pick up a saw, sketch your design. Consider the dimensions: how long, wide, and deep should your shelves be? How many shelves do you need? A simple floating shelf? Or a more substantial multi-tiered unit? Plan for your intended use; a spice rack demands different dimensions than a display shelf for books.

Essential Tools and Materials
Gathering your supplies beforehand ensures a smooth building process. You'll need:
- Your chosen wood (consider pre-cut planks for simplicity)
- Wood glue
- Wood screws (matching your wood tone)
- Drill with appropriate drill bits
- Measuring tape
- Level
- Sandpaper (various grits)
- Wood stain or sealant (optional, but recommended for protection)
- Clamps (to hold pieces together during glue drying)
Building Your Minimalist Shelves: A Step-by-Step Guide
Now for the fun part! This guide focuses on a simple floating shelf design, easily adaptable to various sizes and configurations. Begin by cutting your wood planks to your desired dimensions. Precise measurements are key here; use your measuring tape and a sharp saw (or have your lumber yard pre-cut them). Next, apply wood glue to the joining edges of the shelf supports and carefully attach them to the back of your shelf using wood screws. Ensure your screws are countersunk to prevent them from interfering with the aesthetic. Once the glue has dried completely, sand the surfaces smooth, paying particular attention to any screw holes or rough edges. Finish by applying a wood stain or sealant to protect the wood and enhance its natural beauty. Allow the finish to dry completely before installing your shelves. Remember to use a level to ensure they are perfectly aligned!
Installation and Finishing Touches
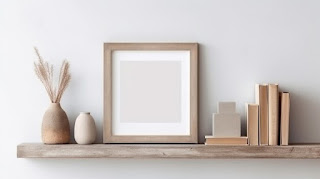
Installing your shelves involves strategically positioning sturdy supports into your wall studs. Use a stud finder to locate these studs for maximum support. Pre-drill pilot holes to prevent splitting the wood during installation. Secure your shelves to the wall using appropriate screws and wall anchors (if necessary). Once installed, step back and admire your handiwork! Keep the minimalist aesthetic intact by carefully curating the items you place on your shelves. Less is more: choose a few meaningful objects or books to highlight rather than overcrowding the space.
Beyond the Basics: Exploring Variations
Once you've mastered the basic floating shelf, explore variations. Consider adding subtle details like rounded edges for a softer look, or experiment with different wood types and finishes to personalize your shelves. You could build a corner shelf to maximize space in a small room or create a multi-tiered unit for greater storage. The possibilities are endless! The key is to maintain the core principles of minimalist design: clean lines, natural materials, and a sense of uncluttered simplicity.
Post a Comment for "Modern Wooden Shelf Plans for Minimalist Decor"