Crafting Your Own Wooden Bath Tray: Beginners Guide
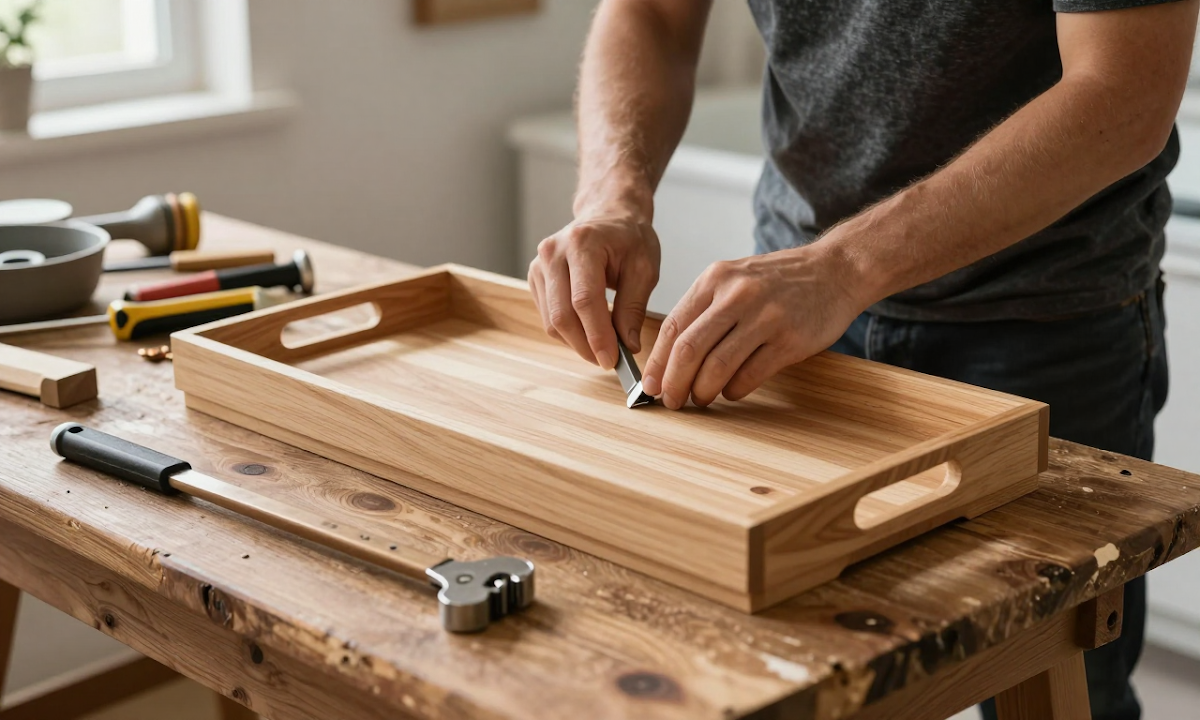
Creating your own wooden bath tray is a delightful way to add a touch of personal style and functionality to any bathroom decor. Whether you're looking for an elegant piece to complement your modern or rustic aesthetic or simply want to save some space, crafting your own wooden bath tray can be both rewarding and enjoyable. In this guide, we'll walk you through the process step-by-step, from gathering essential materials to achieving a polished finish. By the end of this tutorial, you will have learned how to select the right wood types for durability and aesthetic appeal, as well as the best tools and techniques for achieving professional results in your own backyard workshop or garage shed.
In this article:
- Introduction
- Materials Needed
- Step-by-Step Guide
- Tips & Tricks
- Final Thoughts
- Frequently Asked Questions
- Final Thoughts
Introduction
Creating your own wooden bath tray is a delightful project that combines simplicity with functionality. Whether you're looking to add a touch of warmth and rustic charm to your bathroom decor or just want a practical item to hold your essentials while taking a bath, this DIY guide will show you how to make one from scratch.
The benefits of crafting your own wooden bath tray are numerous. First and foremost, it’s highly customizable—allowing you to choose the perfect size, shape, and design that suits your bathroom space or personal style. Using natural wood gives a warm ambiance, enhancing the overall aesthetic of your bathroom while offering a practical use for the tray.
Moreover, making your own bath tray is an excellent way to practice basic woodworking skills such as cutting, sanding, and finishing. It’s also budget-friendly; you can find affordable materials at local hardware stores or online. Plus, the satisfaction of creating something with your hands is incredibly rewarding!
When embarking on this project, it’s essential to gather all necessary materials and tools beforehand. For the bath tray itself, you’ll need 1x6 pine boards for the frame, 2x4s for reinforcement and the backrest, and 3/4-inch exterior plywood or MDF for the bottom panel. You can choose a stain color that complements your bathroom decor to give it a personalized touch.
Begin by cutting all pieces according to your design. Ensure you have a smooth surface with no splinters; sand each piece lightly before assembly. Use galvanized deck screws and wood glue for securing the parts together, as these materials are weather-resistant and hold well in wet environments like bathrooms.
A common beginner mistake is forgetting pilot holes before screwing pieces together. This can lead to stripped screws or uneven surfaces. Always pre-drill pilot holes for screws longer than 2 inches (5 cm) to prevent splitting wood. Another tip is to apply a sealant and finish after assembly to protect the wood from moisture and enhance its durability.
Materials Needed
Materials Needed:
- Wooden Planks: Choose a softwood like pine or fir to ensure easy cutting and sanding. For example, 1x6 (25 mm x 70 mm) planks are suitable for the base.
- Shims: Essential for fitting gaps between wooden pieces smoothly. Available at hardware stores in various sizes.
- Screws or Brads: Use screws with a length of about 2 inches (50 mm) to secure the planks together and brads for temporary fastening during assembly.
- Glue: A quality wood glue like Titebond II Wood Glue is highly recommended as it provides strong bonding. For an extra bond, use hot melt adhesive.
- Sanding Block or Sandpaper: Finer sandpaper (240 grit) for smoothing rough edges and a coarser grade to remove larger splinters.
- Paint or Stain (Optional): If you plan to paint the tray, use a high-quality acrylic paint. For a natural look, opt for wood stain in a color of your choice.
Note: Always choose wood that is knot-free and free from defects as it ensures stability and longevity when used in projects like crafting bath trays.
To ensure your bath tray turns out perfectly, follow these detailed steps:
- Layout and Measuring: Start by measuring the dimensions of where you want to place the tray in your bathroom. Cut two pieces of 1x6 (25 mm x 70 mm) wood to match these measurements using a circular saw or handsaw for accuracy.
- Sanding: Sand the edges of all pieces with 240 grit sandpaper until smooth. This step is crucial as it ensures a comfortable fit when assembling.
- Fitting and Marking: Lay the pieces flat on a stable surface. Use shims to fit them together snugly, marking where each piece needs to be cut to achieve perfect alignment later.
Mistake: Always measure twice and cut once to avoid cutting errors that can waste material.
Mistake: Over-sanding or under-sanding can weaken your project; aim for an even finish.
Mistake: Shims should be used only for initial fitting; don’t rely solely on them as they can cause uneven gaps.
- Cutting to Fit: Using the marks as a guide, carefully cut any extra material off each piece with a sharp saw. Always wear safety goggles and use proper cutting techniques to prevent accidents.
Mistake: Cutting without checking measurements can lead to an oversized tray that won't fit in your bathroom.
- Sanding Again: Sand the edges of all pieces again, focusing on any rough spots left after cutting. This ensures a smooth and professional finish.
Mistake: Skipping this step can leave visible imperfections that detract from your tray's appearance.
- Assembling with Glue: Apply wood glue to the edges of one piece, and immediately place it against another. Press together firmly, holding in place for a few minutes until dry.
Mistake: Rushing this step can result in uneven bonding or gaps.
- Add Screws: Once the glue has dried, use screws to reinforce the bond. Start by screwing through both pieces at each corner and then along the sides.
Mistake: Skimping on screws can lead to a weaker structure that may not hold up over time.
- Paint or Stain (Optional): If you plan to paint the tray, apply primer first. Allow it to dry before applying two coats of your chosen finish.
Mistake: Not priming can cause paint to peel off over time.
- Clean Up and Final
Step-by-Step Guide
To assemble your own wooden bath tray, follow these simple steps:
- Safety Gear Required: Wear safety goggles to protect your eyes from splinters and a dust mask when sawing.
- Tools Needed: A circular saw or handsaw for cutting wood, a drill with a screwdriver bit for securing the pieces together, a tape measure, a speed square for checking angles, a 4-ft level to ensure straight edges, sandpaper (80 grit and finer), a hammer.
- Materials List: Pressure-treated lumber for durability, screws or dowels, and finish coats of varnish or paint as desired. For the example dimensions, we'll use an 18x24 inch tray.
Step 1: Cut Your Lumber
- Using your circular saw or handsaw, cut two 18-inch lengths and four 24-inch lengths from the pressure-treated lumber. These dimensions ensure a sturdy frame for your bath tray while fitting comfortably in most bathtubs.
Step 2: Assembling the Frame
- Arrange the two 18-inch pieces parallel to each other and the four 24-inch pieces perpendicular, creating an open box shape. Use a speed square to ensure your cuts are at right angles. Secure these pieces together with screws or dowels.
Step 3: Finishing the Edges
- Sand all edges of the frame using fine-grit sandpaper until they're smooth and rounded, but not overly worn down where you plan to rest your hands on it. This step makes for a safer grip when handling hot objects.
Step 4: Adding the Bottom
- Create the bottom of the tray by cutting another piece of lumber (about 18x20 inches) to fit inside the frame. Attach this piece with screws or dowels, ensuring it's level and secure within your frame.
Step 5: Final Touches
- Apply a coat of finish varnish or paint on all sides of your tray for protection against water damage. Allow it to dry completely before use.
Tips & Tricks: Always measure twice and cut once; this simple rule will save you from wasting material. Keep an eye out for uneven cuts, especially at the corners where additional sanding may be necessary for a smooth finish.
- Inspect your tray periodically to ensure it remains secure and in good condition after use. If any screws or dowels become loose, tighten them immediately to prevent pieces from coming apart.
Tips & Tricks
When crafting your own wooden bath tray, here are some tips to ensure it looks professional: 1. Precision in Measurement: Always double-check measurements before cutting wood pieces. Even a slight miscalculation can affect the overall appearance of the tray. 2. Sanding and Finishing: Invest time in sanding all surfaces of your wooden bath tray to smooth out rough edges and create an even finish. Use progressively finer grits from coarse to fine until you reach 220-grit for a silky texture. Apply multiple coats of a clear polyurethane or satin varnish, letting each coat dry thoroughly before adding the next. 3. Edge Finishing: For a clean and polished edge, use a router with a straight bit to round over all edges of your tray. This technique adds a subtle elegance while protecting any sharp corners from wear and tear. 4. Aesthetic Detailing: Consider adding small decorative elements such as inlays or carved motifs. These touches can elevate the look of your wooden bath tray, making it more personalized and eye-catching. 5. Use of Natural Wood Grain: Embrace the natural beauty of wood by using different types of wood for varying parts of the tray to create a unique and artisanal look. For example, you could use solid walnut for the outer frame with maple or cherry for the inner surface where your hands will rest. 6. Quality Fasteners: Use high-quality screws or nails that match the tone and finish of your wood. This adds a professional touch to your project by ensuring no visible fastener heads mar the finished look. 7. Painting vs Staining: If you prefer, painting over staining can give your tray a more uniform color with fewer variations in shade. However, staining brings out the natural beauty of wood grain and enhances its rich colors for an earthy appearance. 8. Maintenance Tips: To keep your wooden bath tray looking fresh, it's important to wipe down any water stains quickly and apply a protective finish every few years. This will ensure that the wood remains smooth and free from scratches or damage caused by daily use. By following these tips, you'll be able to create a wooden bath tray that looks like something you'd find in an upscale bathroom, all while keeping it within your own budget! Happy crafting!
Final Thoughts
Now that you've completed crafting your wooden bath tray, it's time to enjoy the fruits of your labor! This simple yet elegant piece adds a touch of warmth and character to any bathroom space. You've taken the first step in woodwork by understanding basic design principles and executing them with skill. Congratulations on completing this project!
Tips & Tricks
Remember, woodworking is an art that improves with practice. Don't be discouraged if your first projects aren't perfect. Keep practicing, experimenting with different techniques, and learning from mistakes.
- Pilot Holes: Always pre-drill pilot holes for screws when attaching wood pieces to prevent splitting the material.
- Sanding: Sand your project thoroughly before finishing. A smooth surface enhances both appearance and touch.
- Cleaning: After completing any woodworking project, take a moment to clean up tools and surfaces with a damp cloth or soap to remove sawdust and debris.
For further learning, consider checking out local community workshops or woodcraft schools. Many offer classes for beginners that can help you improve your skills and learn new techniques. Additionally, exploring online resources such as YouTube tutorials, woodworking blogs, and forums like Reddit’s r/woodworking can provide valuable insights into different styles of crafting.
Happy crafting! Whether you're making bath trays or something more complex, enjoy the process and the satisfaction that comes from creating with your own hands. Keep learning and sharing your creations for a rewarding hobby that enhances your home decor.
Frequently Asked Questions
How long does it take to make a wooden bath tray?
It takes about 12 hours over two days for an experienced crafter. Beginners may need more time due to unfamiliarity with tools or techniques.
Final Thoughts
With your new wooden bath tray, you’ve added a touch of rustic charm to your bathroom. The most important takeaways are: 1. Precision is Key: Take your time with measurements and cuts; accuracy ensures a perfect fit. 2. Secure Joints: Use glue and clamps for strong joints that won’t come apart after use. 3. Stain or Paint: Choose a finish that complements your bathroom decor, enhancing the tray's appearance. Tonight, take 15 minutes to gather your tools and lay out your project area. You’ve got what it takes—just one small step can make all the difference.


Post a Comment for "Crafting Your Own Wooden Bath Tray: Beginners Guide"